 PhotoTune
 Home / Guides / Remove pimples from iPhone photos
How to remove pimples from a photo on iPhone
Short answer
On an iPhone with Apple Intelligence, which Apple lists as iPhone 15 Pro, iPhone 15 Pro Max and iPhone 16 models or later, the Photos app's Clean Up tool can remove a spot: tap Edit, Tools, Clean Up, then tap or circle it. On other iPhones, Photos has no spot tool. PhotoTune's Heal tool removes a spot with one tap and does not need Apple Intelligence.
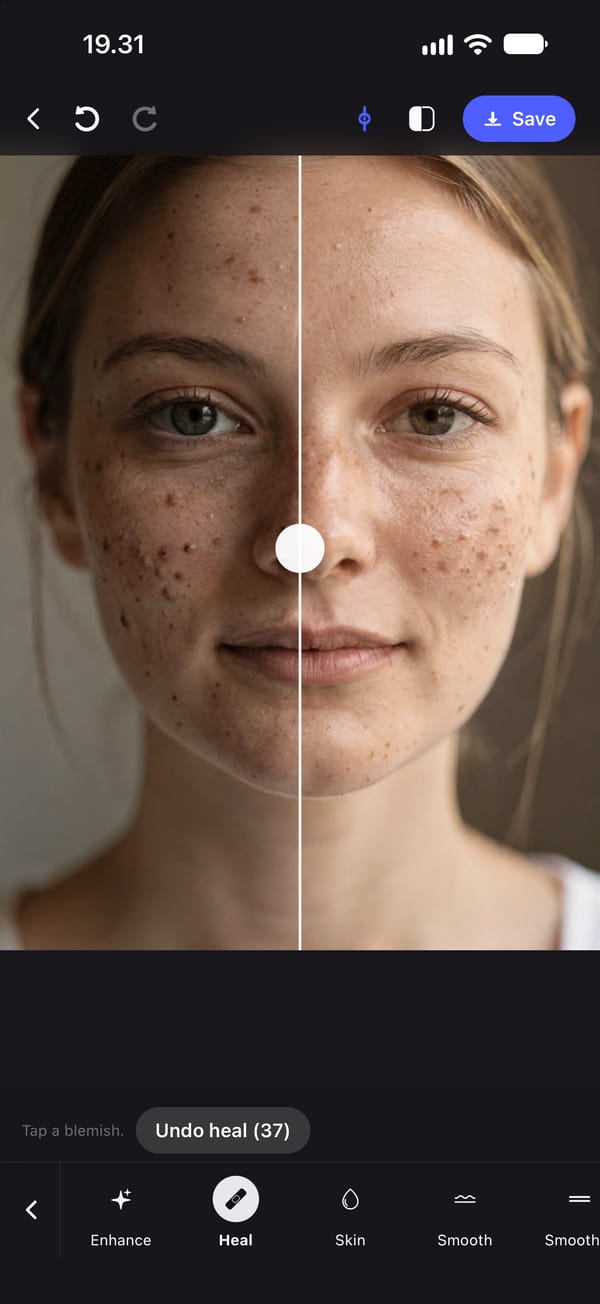
Two ways to remove a pimple from a photo on iPhone, compared
| Photos Clean Up | PhotoTune Heal | |
|---|---|---|
| Works on | iPhone 15 Pro, iPhone 15 Pro Max, and iPhone 16 models or later | Does not need Apple Intelligence |
| How | Tap, brush or circle the spot | Tap the spot |
| Made for | Removing distracting objects from a photo | Small spots on skin |
| Undo | Restore while editing, or Reset afterwards | Undo heal, one tap at a time |
| Works without a connection | Apple does not say. Usage limits may apply | Yes |
| Cost | Free, part of the iPhone | A subscription to save the photo |
Remove a pimple with Clean Up in the Photos app
Clean Up is the Photos app's own removal tool. Apple describes it as a way to remove distracting objects from a photo, and a pimple is small enough to be treated as one. If your iPhone has it, it is the place to start, because it is already on the phone and it is free.
We could not test Clean Up for this guide. The iPhone simulator has no Apple Intelligence, so the steps below are Apple's, from its iOS 27 guide, and the screenshot shows what the editor looks like on a device without it.
What you need: An iPhone with Apple Intelligence. Apple lists iPhone 15 Pro, iPhone 15 Pro Max, and iPhone 16 models or later, and says Clean Up is not available in every language or region.
-
Open the photo and tap Edit
In Photos, open the photo and tap the Edit button, the icon with sliders on it.
-
Tap Tools, then Clean Up
Tools is where Photos keeps its Apple Intelligence editing. If there is no Tools tab, the iPhone does not have Clean Up.
-
Zoom in on the spot
Apple's guide says you can pinch with two fingers to zoom or pan. A pimple is small, and zooming in keeps the selection tight.
-
Tap or circle it
Tap, brush over or circle what you want to remove. Photos may highlight some items for you, so that one tap removes them.
-
Restore anything it took by mistake
Clean Up has a restore button for bringing back something you removed. Use it if a freckle or part of an eyebrow went with the spot.
-
Tap Done
To undo the whole thing later, open the photo in Clean Up again and tap Reset.
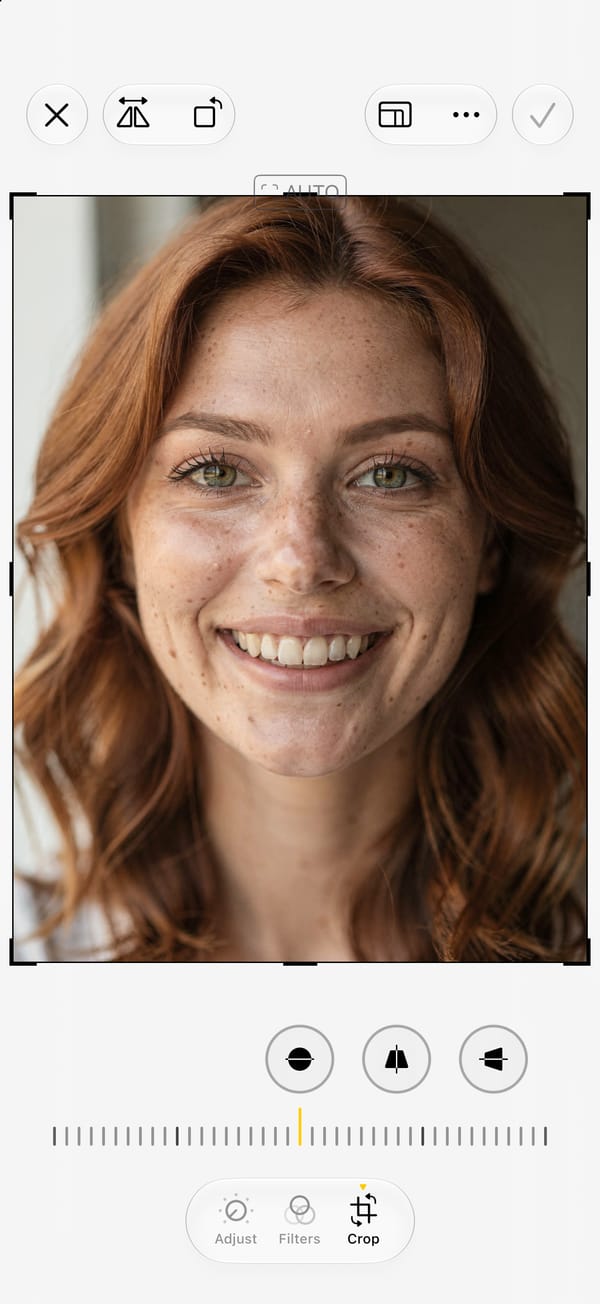
Where it falls short
Clean Up only exists on iPhones with Apple Intelligence, and Apple says it is not available in every language or region and that usage limits may apply. It is described as an object remover, not as a skin tool, and Apple Intelligence fills in what it removes. We have not tested how it handles skin texture, so look at the result at full size before you keep it.
Remove pimples one tap at a time, with PhotoTune's Heal tool
Heal covers a spot with clean skin copied from right beside it. Because the patch is real skin from the same photo, it matches the colour and texture around it, and the pores stay. Nothing is generated, and the skin you do not tap is not touched.
It runs on the iPhone. The photo is not sent anywhere.
What you need: An iPhone and the app. Heal does not need Apple Intelligence or a connection.
-
Open the photo, tap Retouch, then Heal
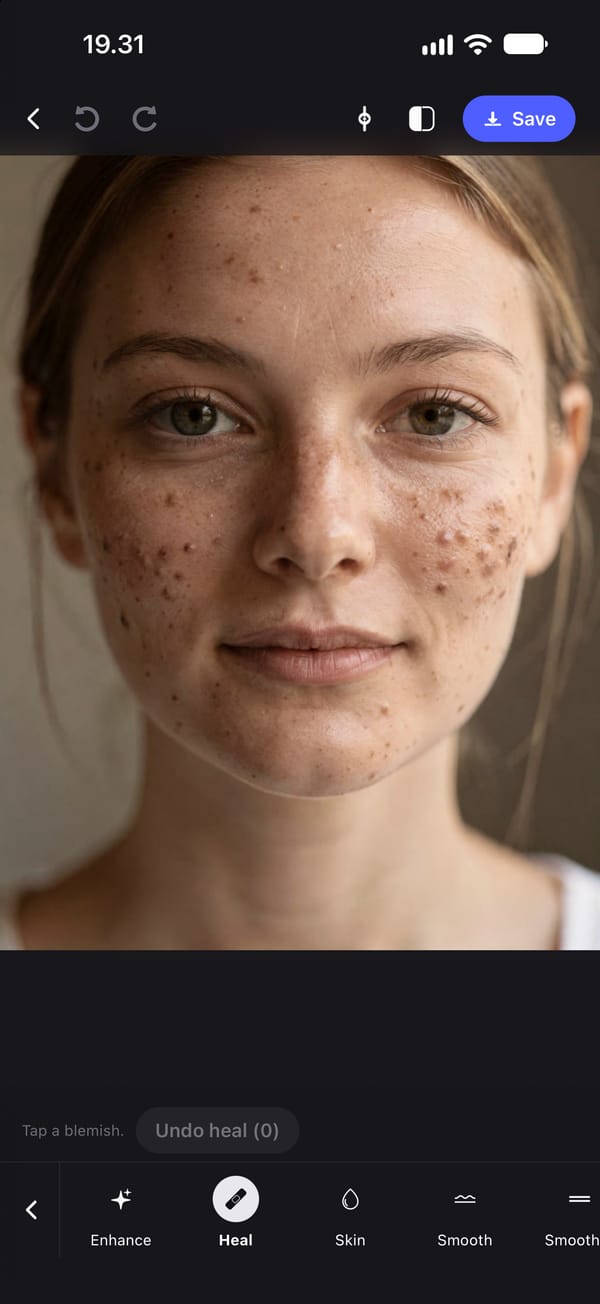
Retouch is the second group along the bottom of the editor, and Heal is its second tool. The panel reads Tap a blemish.
-
Zoom in if the spots are small
Pinch to zoom, so that each tap lands on the spot and not beside it.
-
Tap each spot
One tap covers one spot. The brush size is set for you from the size of the face in the photo, so it covers a typical pimple without spreading onto the skin around it.
-
Undo a tap that missed
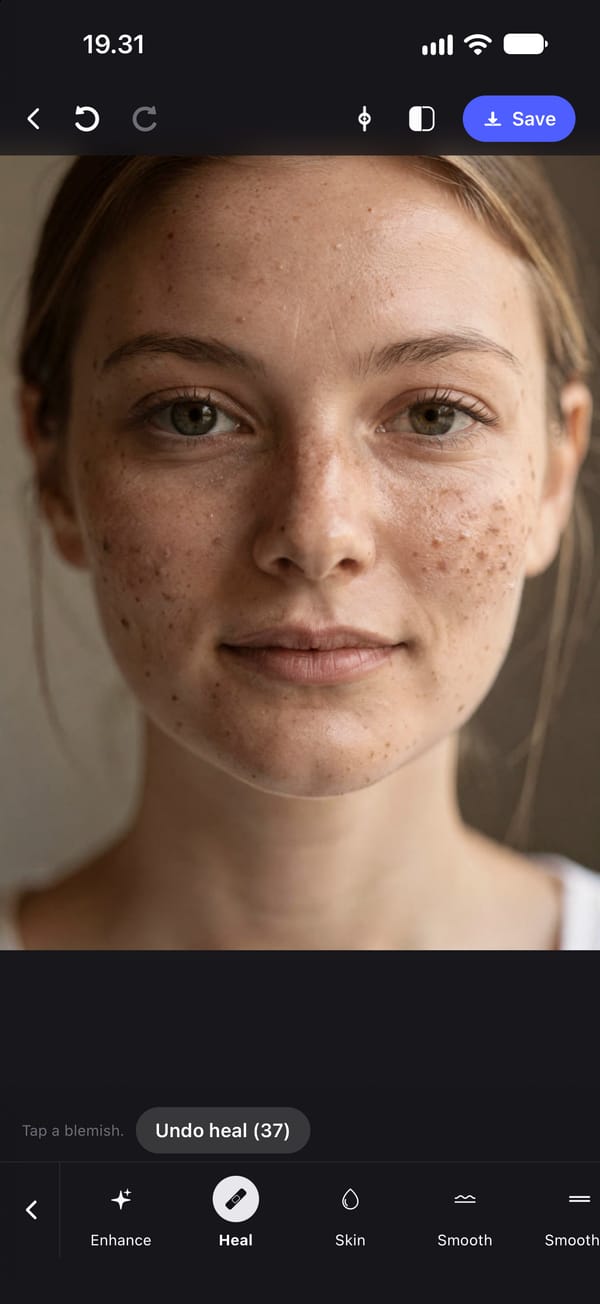
Undo heal steps back one tap at a time, and the number on the button says how many heals there are. Every heal is kept separately, so undoing one leaves the others.
-
Compare with the original
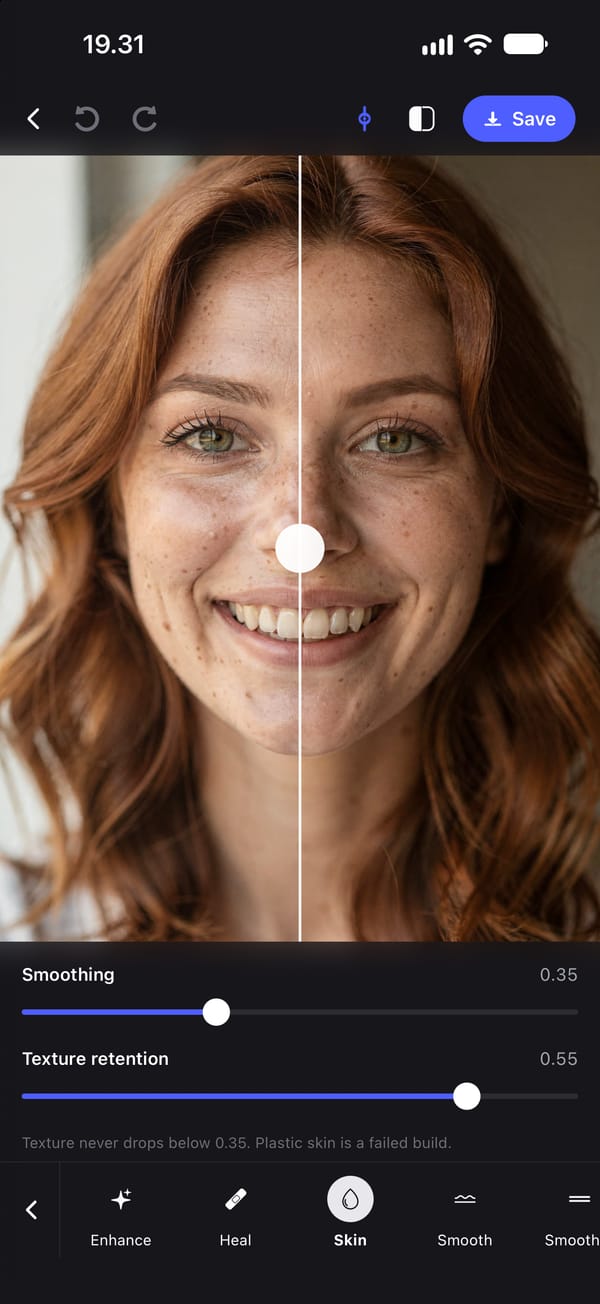
Tap the split button at the top of the editor to put a divider through the photo, with the original on the left.
-
Soften small red blotches, if any are left
If small red blotches are left, open Skin, keep Smoothing moderate and Texture high. It does not change the colour of a wider red patch. Smoothing in PhotoTune always puts back at least 35% of the fine detail.
-
Save
Save writes a new JPEG to your camera roll at the photo's own resolution, with no watermark. The photo you opened is not changed.
Where it falls short
Heal is for small things: a pimple, a mark, a stray hair. It works by copying nearby skin, so on a large patch it repeats the same skin over and over, which starts to show. It also takes one tap per spot. The example here took 37, and a face with many spots takes patience. A wide area of redness is beyond it, and beyond light smoothing too, which softens small blotches but does not change the colour of a wider patch.
Remove the spot, not the skin
The usual way a photo ends up looking edited is that one pimple was hidden by smoothing the whole face. Smoothing hard enough to hide a spot softens every pore along with it, and the result is the waxy look people are trying to avoid.
Healing works the other way round. Each spot is dealt with on its own, and the rest of the skin is exactly as the camera recorded it. If you do want to even the skin afterwards, do it second and do it lightly.
Scars, moles, freckles and stray hairs
Both tools treat every small mark the same way, so they work on a scar, a mole, a stray hair across the cheek or a speck of dust on the lens. PhotoTune's Heal does not need a face in the photo, so a mark on an arm or a shoulder can be healed too.
Whether to remove a permanent feature is your choice. A photo with every freckle removed stops looking like the person, which is a good reason to tap only what will be gone by next week.
Removing blemishes in Facetune
Facetune's own page lists its steps as opening the app and selecting a photo, choosing Heal for small blemishes or Patch for larger areas, tapping or swiping over the area, and adjusting the intensity with a slider. PhotoTune has no equivalent of a patch tool for large areas.
Getting PhotoTune
PhotoTune is an iPhone app; there is no Android or web version. Saving an edited photo needs a subscription, and the annual plan starts with 3 days free. The pricing page has every plan and what the trial turns into.
Sources
What this guide says about software other than PhotoTune comes from the pages below, read on the dates shown. The PhotoTune screenshots are captures of the app.
FAQ
Remove pimples from iPhone photos: common questions
Still have a question?
Anything not answered here — a device, a photo it struggled with, or how the trial works — reaches a person at this address.
Ask a questionCan I remove a pimple from a photo on iPhone without an app?
On an iPhone with Apple Intelligence, yes: open the photo in Photos, tap Edit, Tools, Clean Up, and tap the spot. On other iPhones the Photos app has no tool that removes a spot.
Which iPhones have Clean Up in Photos?
Apple lists iPhone 15 Pro, iPhone 15 Pro Max, and iPhone 16 models or later, and says Clean Up is not available in every language or region.
What is the difference between healing a spot and smoothing skin?
Healing replaces one spot and leaves everything else alone. Smoothing softens the whole area it is applied to, pores included. Heal the spots first, then smooth lightly only if small blotches remain.
Will removing pimples make my skin look fake?
Not if you remove only the spots. Skin looks fake when its texture is gone, and healing a spot keeps the texture around it.
Can I undo it later?
In Photos, open Clean Up again and tap Reset. In PhotoTune, Undo heal steps back one tap at a time while you are editing, and saving writes a new photo, so the one you opened stays as it was.
Does PhotoTune send my photo anywhere to remove a blemish?
No. Healing runs on the iPhone, needs no connection, and the photo is not sent to a server.
The tools in this guide
- Pimple remover
Pimple remover for iPhone photos
A pimple remover for iPhone photos. Tap a pimple and Heal covers it with clean skin from right beside it, so the skin keeps its texture. Runs on your phone.
- Blemish remover
Remove blemishes from photos on iPhone
Get rid of blemishes on photos with a tap. A photo blemish remover for iPhone: Heal copies clean skin from beside each spot, so texture stays. Runs on your phone.
- Natural retouch
Natural photo retouch for iPhone
A natural photo retouch app for iPhone. Smooth skin, clear blemishes and fix lighting while pores and skin texture stay. Retouching runs on your phone.
- Remove objects
Remove objects from a photo on iPhone
Remove objects, people in the background or text from a photo on iPhone. Paint over what to remove, or let the AI find background clutter, people or signs.
- Teeth whitening
Whiten teeth in photos on iPhone
Whiten teeth in photos on iPhone without the bright white look. A teeth whitening app with sliders for teeth and eye whites, placed by face detection on your phone.