 PhotoTune
 Home / Guides / Whiten teeth in iPhone photos
How to whiten teeth in a photo on iPhone
Short answer
The iPhone's Photos app has no teeth whitening tool. Its Adjust sliders change the whole photo, so taking the yellow out of teeth with Warmth or Saturation also takes colour out of the skin around them. To whiten only the teeth you need an editor that finds them. In PhotoTune that is Retouch, then Whiten, then one Teeth slider.
Two ways to whiten teeth in a photo on iPhone, compared
| Photos app | PhotoTune | |
|---|---|---|
| What it changes | The whole photo | Only the teeth |
| How | Lower Warmth, then Saturation, under Adjust | One Teeth slider. The mouth is found for you |
| What you need | Any iPhone. Nothing to install | The app, and a photo where the teeth are showing |
| Works without a connection | Yes | Yes |
| Cost | Free, part of the iPhone | A subscription to save the photo |
| Use it when | The whole photo is too yellow, because of the light it was taken in | The light is fine and only the teeth are off |
Whiten teeth in the iPhone Photos app, without another app
Photos can make teeth less yellow, but only by making the whole photo less yellow. That is sometimes all a photo needs. A picture taken under warm indoor bulbs is yellow everywhere, teeth included, and correcting the light corrects the teeth along with it.
Apple's guide to editing photos on iOS 27 lists light and colour adjustments, styles, filters, cropping and the Apple Intelligence tools. None of them selects teeth, so this is a correction to the photo and not to the smile.
What you need: Any iPhone. Nothing to install.
-
Open the photo and tap Edit
In Photos, open the photo and tap the Edit button, the icon with sliders on it, under the photo.
-
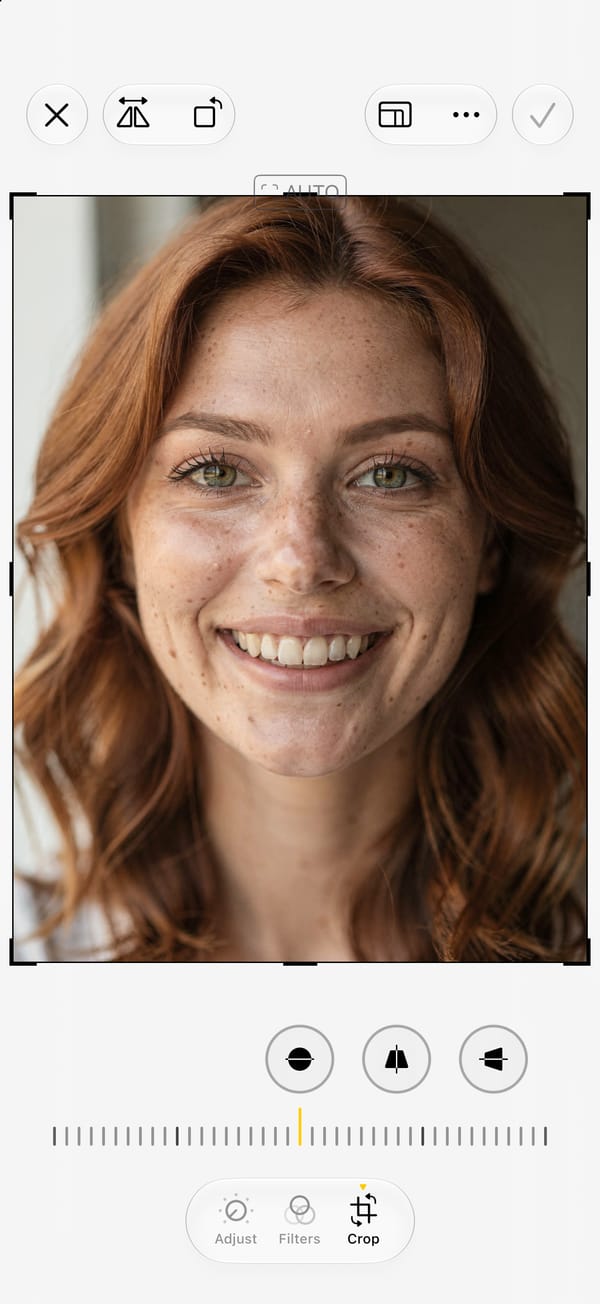
Tap Adjust
Swipe left under the photo to move through the settings. Apple's guide names Exposure, Brilliance and Highlights as the first few; Warmth and Saturation are further along.
-
Lower Warmth a little
Warmth is the balance between yellow and blue for the whole photo. A small move towards blue takes a yellow cast off the teeth, and off everything else in the frame.
-
Lower Saturation slightly, if the teeth are still yellow
Saturation is the strength of every colour at once. A small reduction dulls the yellow in the teeth. It dulls lips and skin by the same amount, which is where this method ends.
-
Tap Done
Done saves the edit. If the face has gone grey, tap Cancel and then Discard Changes, and the photo is as it was.
Where it falls short
Every slider under Adjust applies to the whole photo. There is no brush and nothing that selects the mouth, so the teeth can only get as much whiter as the rest of the photo gets cooler or paler. When the skin starts to look grey, you have gone past what this method can do. If the photo's light was fine to begin with, it cannot help at all.
Whiten only the teeth, with PhotoTune's Whiten tool
Whiten finds the face on your phone, locates the mouth from the face landmarks, and changes only the teeth inside it. There is one slider and nothing to paint, and the skin and lips around the teeth are left as they were.
Face detection and whitening both run on the iPhone. The photo is not sent anywhere, and the tool works with no connection.
What you need: An iPhone, the app, and a photo where the teeth are showing.
-
Open a photo with the teeth showing
Tap the photo on Home, or the plus button to pick one. A closed smile or a strong side angle hides the teeth, and the app says so rather than whitening the wrong area.
-
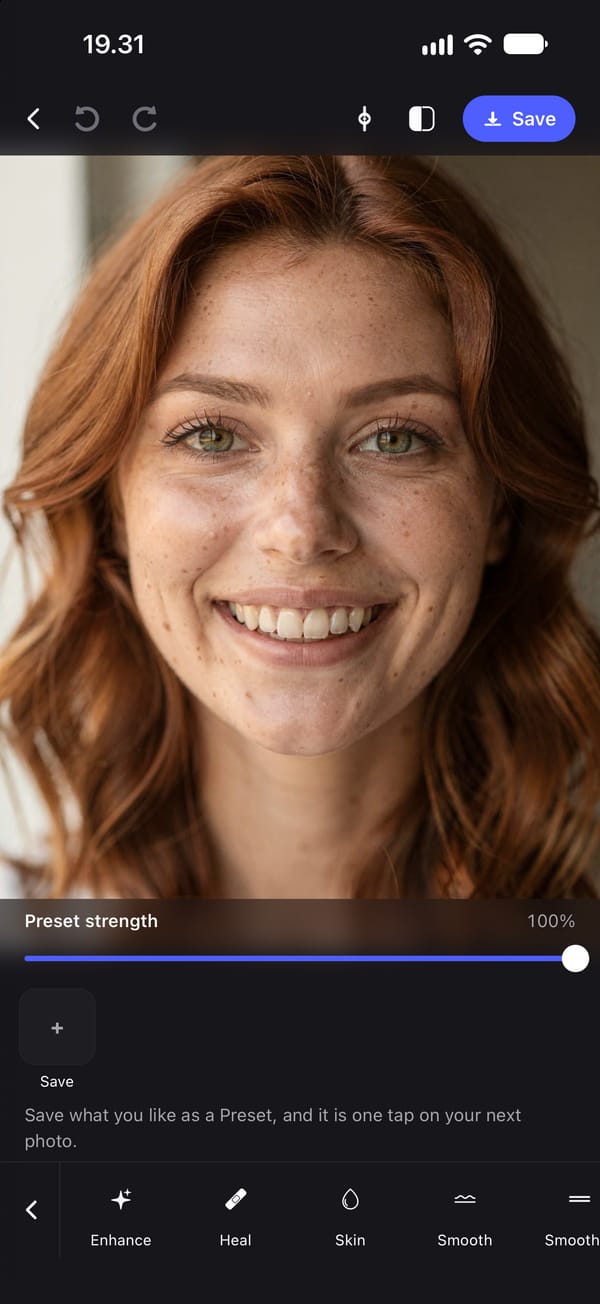
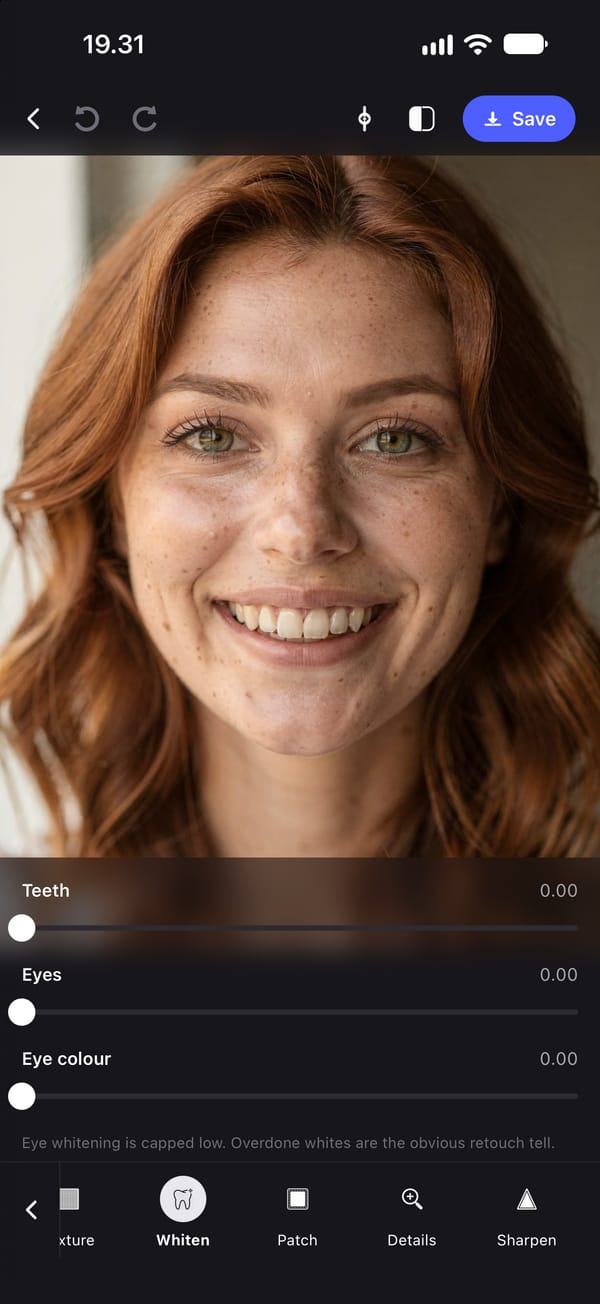
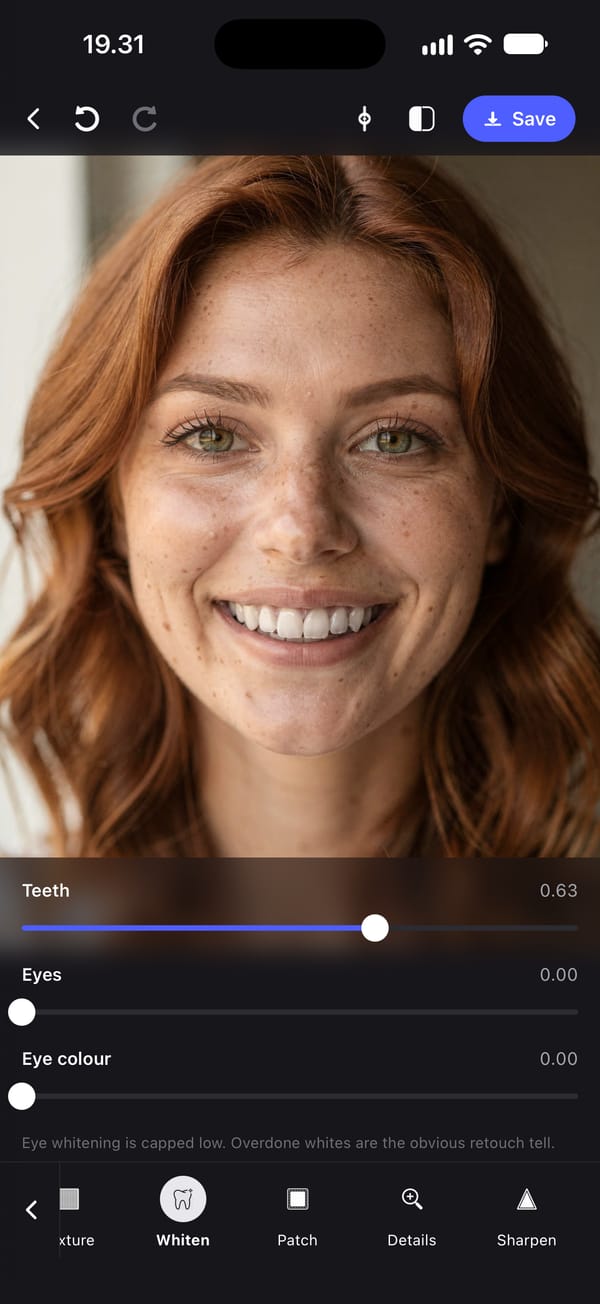
Tap Retouch, then swipe the tools to Whiten
Retouch is the second group along the bottom of the editor. Its tools scroll sideways, and Whiten comes after Texture.
-
Raise the Teeth slider
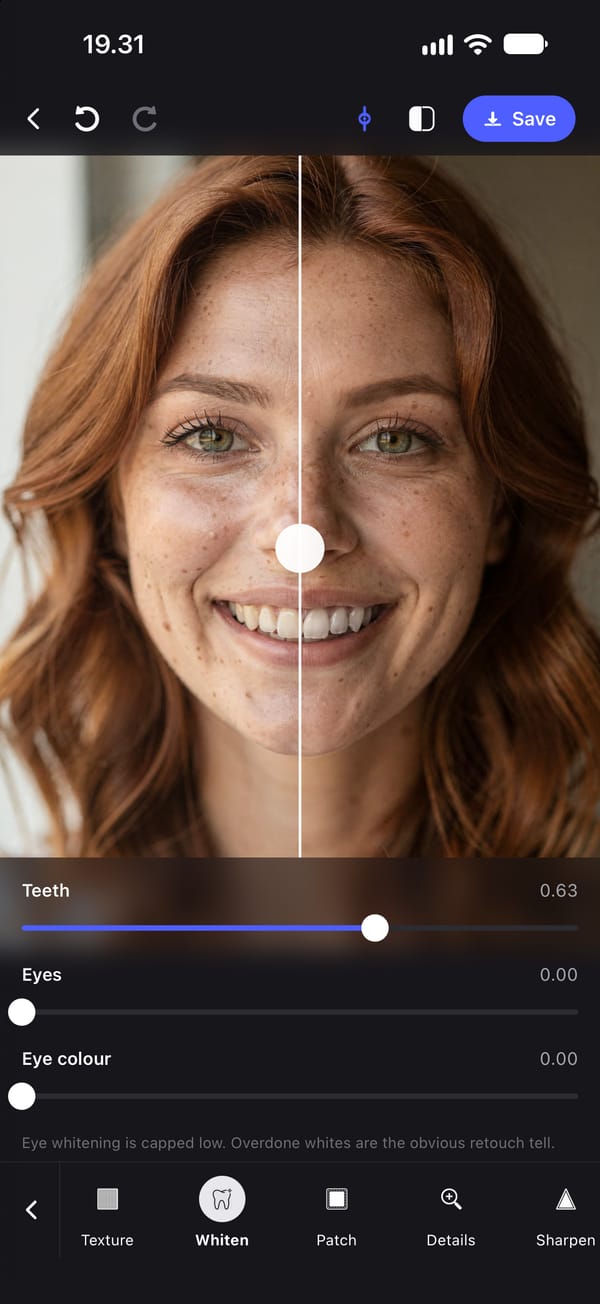
It starts at 0.00. In the screenshots here it is at 0.63, which was enough to take a clear yellow cast off this photo. Most photos need less.
-
Compare with the original
Tap the split button at the top of the editor to put a divider through the photo, with the original on the left. Bring the slider back until the teeth look clean, not white.
-
Leave Eyes alone unless they need it
The Eyes slider in the same tool brightens the whites of the eyes. It is capped at a low maximum on purpose, because overdone eye whites are the first thing that looks edited.
-
Save
Save writes a new JPEG to your camera roll at the photo's own resolution, with no watermark. The photo you opened is not changed.
Where it falls short
Whiten has to find the teeth before it can change them. It is built for one clear, roughly front-facing face: a closed smile, heavy shadow over the mouth, a face that is tiny in the frame or several faces at once can all defeat the detection. It changes colour only. It cannot straighten a tooth or rebuild one that is hidden or out of focus.
Why teeth look yellow in photos
Most of the time it is the light and not the teeth. Indoor bulbs are far yellower than daylight, and a camera that has not fully corrected for them leaves a warm cast on anything pale: teeth, the whites of the eyes, a white shirt. Teeth also sit next to lips, and a strong lip colour makes them look yellower by contrast.
That is why the first thing to check is the whole photo. If a white shirt or a white wall in the frame looks cream, correct the light first, in Photos or in any editor, and look at the teeth again afterwards. Whiten what is left.
How white is too white
Teeth whitened to pure white are the quickest way to make a photo look edited. Real teeth are a warm, slightly uneven off-white, and they are almost never the brightest thing in a face.
A useful check is the whites of the eyes. In an unedited photo the teeth are usually a little darker and warmer than the eye whites. If your edit has made the teeth brighter than the eyes, bring the slider back. Then look at the photo at the size people will see it, not zoomed in on the mouth.
Whitening teeth in Facetune and other apps
Several photo editors have a teeth tool. Facetune's own page describes its steps as uploading the photo, selecting the Retouch tool, choosing Whiten, and adjusting the slider and the selected area. It also says its tool works on several people in one photo, which PhotoTune's is not built for.
Whichever app you use, the two checks above still apply: fix the light first, and stop before the teeth are brighter than the eyes.
Getting PhotoTune
PhotoTune is an iPhone app; there is no Android or web version. Saving an edited photo needs a subscription, and the annual plan starts with 3 days free. The pricing page has every plan and what the trial turns into.
Sources
What this guide says about software other than PhotoTune comes from the pages below, read on the dates shown. The PhotoTune screenshots are captures of the app.
FAQ
Whiten teeth in iPhone photos: common questions
Still have a question?
Anything not answered here — a device, a photo it struggled with, or how the trial works — reaches a person at this address.
Ask a questionCan you whiten teeth in the iPhone Photos app?
Not on their own. Photos has no teeth tool. Lowering Warmth or Saturation under Adjust makes the teeth less yellow by making the whole photo less yellow, which works when the photo was taken in warm light and not otherwise.
Does the iPhone have a teeth whitening filter?
No. The filters and Photographic Styles in Photos change the look of the whole photo. None of them is aimed at teeth.
How do I whiten teeth in a photo without it looking fake?
Use less than you think. Aim for clean off-white, keep the teeth a little darker than the whites of the eyes, and compare against the original before you save.
Why do my teeth look yellow in photos?
Usually because of the light. Indoor bulbs put a warm cast on anything pale, and lip colour makes teeth look yellower by contrast. Correct the light in the whole photo first, then whiten what is left.
Does whitening teeth in PhotoTune send my photo anywhere?
No. Face detection and whitening run on the iPhone with no connection, and the photo is not sent to a server.
Can I whiten teeth in a group photo?
PhotoTune's Whiten is built for one clear face, and several faces in the frame can defeat its detection. Facetune says its teeth tool works on several people at once.
The tools in this guide
- Teeth whitening
Whiten teeth in photos on iPhone
Whiten teeth in photos on iPhone without the bright white look. A teeth whitening app with sliders for teeth and eye whites, placed by face detection on your phone.
- Natural retouch
Natural photo retouch for iPhone
A natural photo retouch app for iPhone. Smooth skin, clear blemishes and fix lighting while pores and skin texture stay. Retouching runs on your phone.
- Brighten photo
Brighten a dark photo on iPhone
Brighten a dark photo on iPhone with Exposure and Contrast, then warm it up or add a colour grade. Works on any photo and runs on your phone.
- Blemish remover
Remove blemishes from photos on iPhone
Get rid of blemishes on photos with a tap. A photo blemish remover for iPhone: Heal copies clean skin from beside each spot, so texture stays. Runs on your phone.